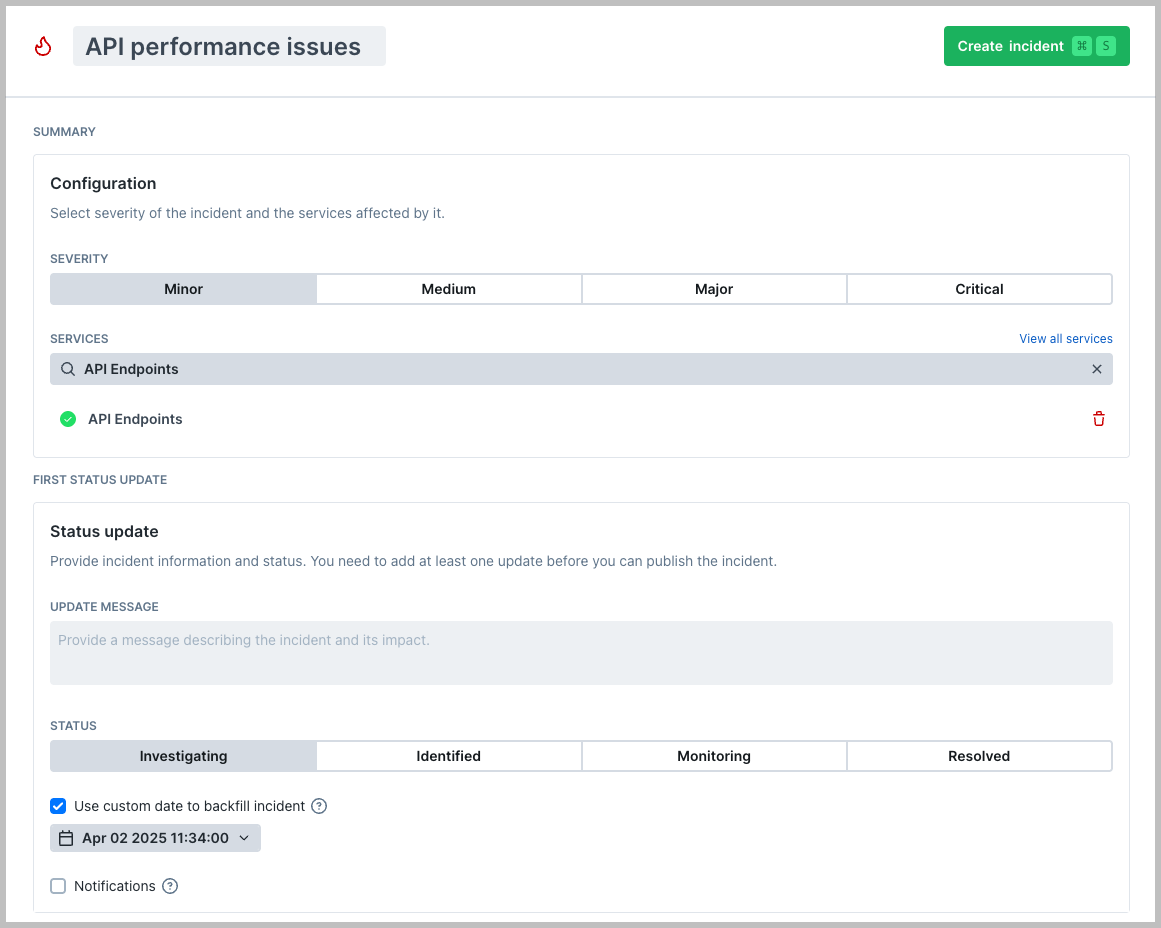
Creating an incident
Create an incident when you want to communicate downtime or known issues of your services to users via your Status Page.- Click ‘Status pages’ in the sidebar and open your Status Page.
- Click ‘Add incident’ at the top right, or click the fire icon at the bottom of the card that most relates to the incident you’re about to create
- Enter the name of the incident
- Choose the severity of the incident
- Select which services are impacted in the dropdown list.
Note that incidents will be posted on all status pages where a service is present. See Services for more details.
- Write the initial incident update message, and update the status of the incident.
- If you want to backfill the incident, select
Use custom date. See Backfilling incidents for more information. - Select if you want to notify subscribers of your Status Page about the incident.
- Click ‘Create incident’
All times on status pages are displayed in UTC.
Updating an incident
To update an ongoing incident go to the ‘Incidents’ tab on your Status Page and select the incident to update.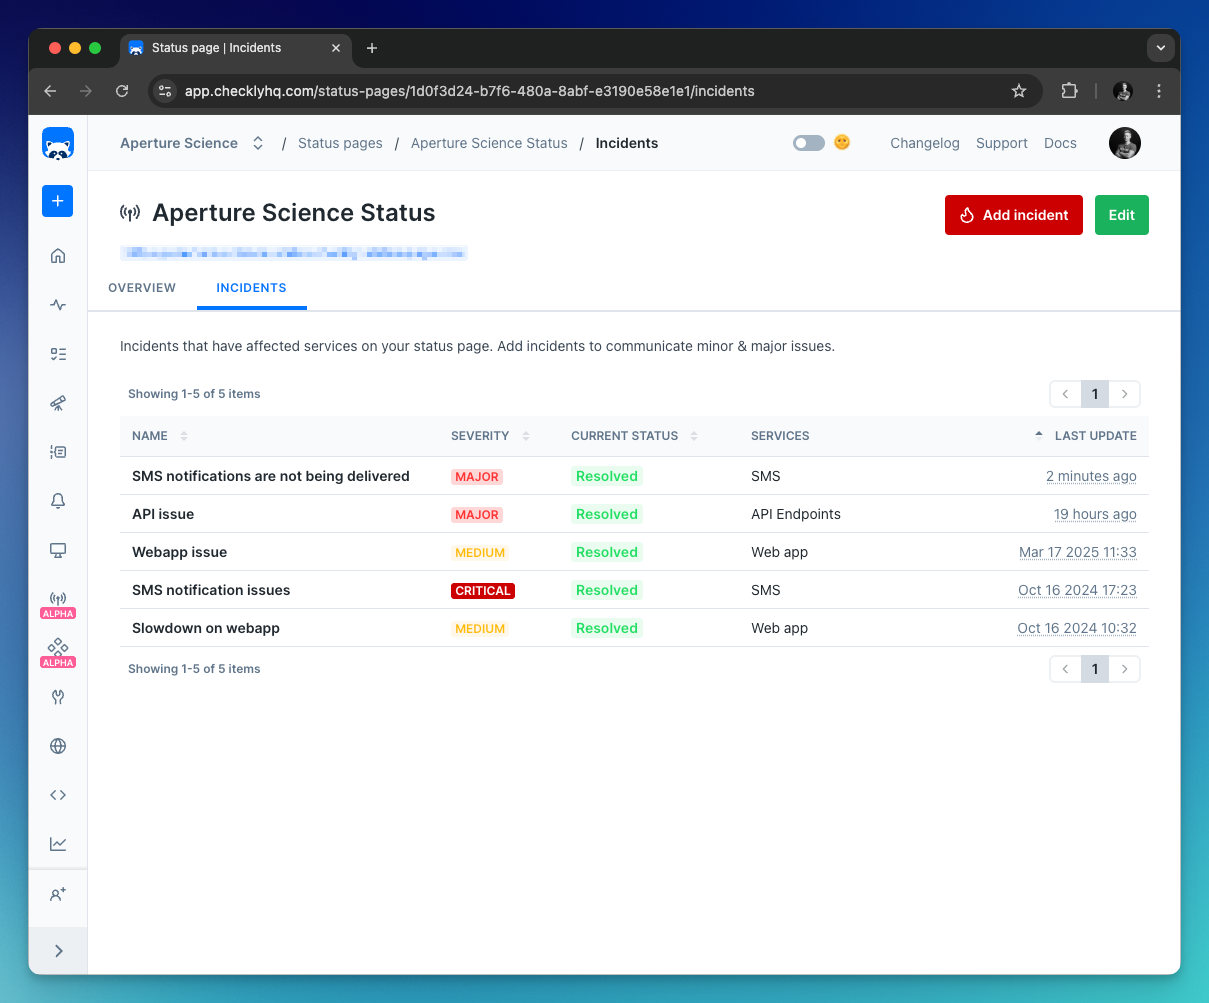
- Post a new status update for the incident
- Edit existing updates
- Change the impacted services
- Change the incident severity
- Delete the incident entirely
Incident notifications
Whenever you post an incident update, Checkly can automatically send email notifications to users subscribed to your Status Page. Emails are sent out only when an update is first posted. Notifications are not sent again if the incident update is edited. If you want to post an incident update without notifying your subscribers you can uncheck the ‘Notifications’ checkbox when updating the incident.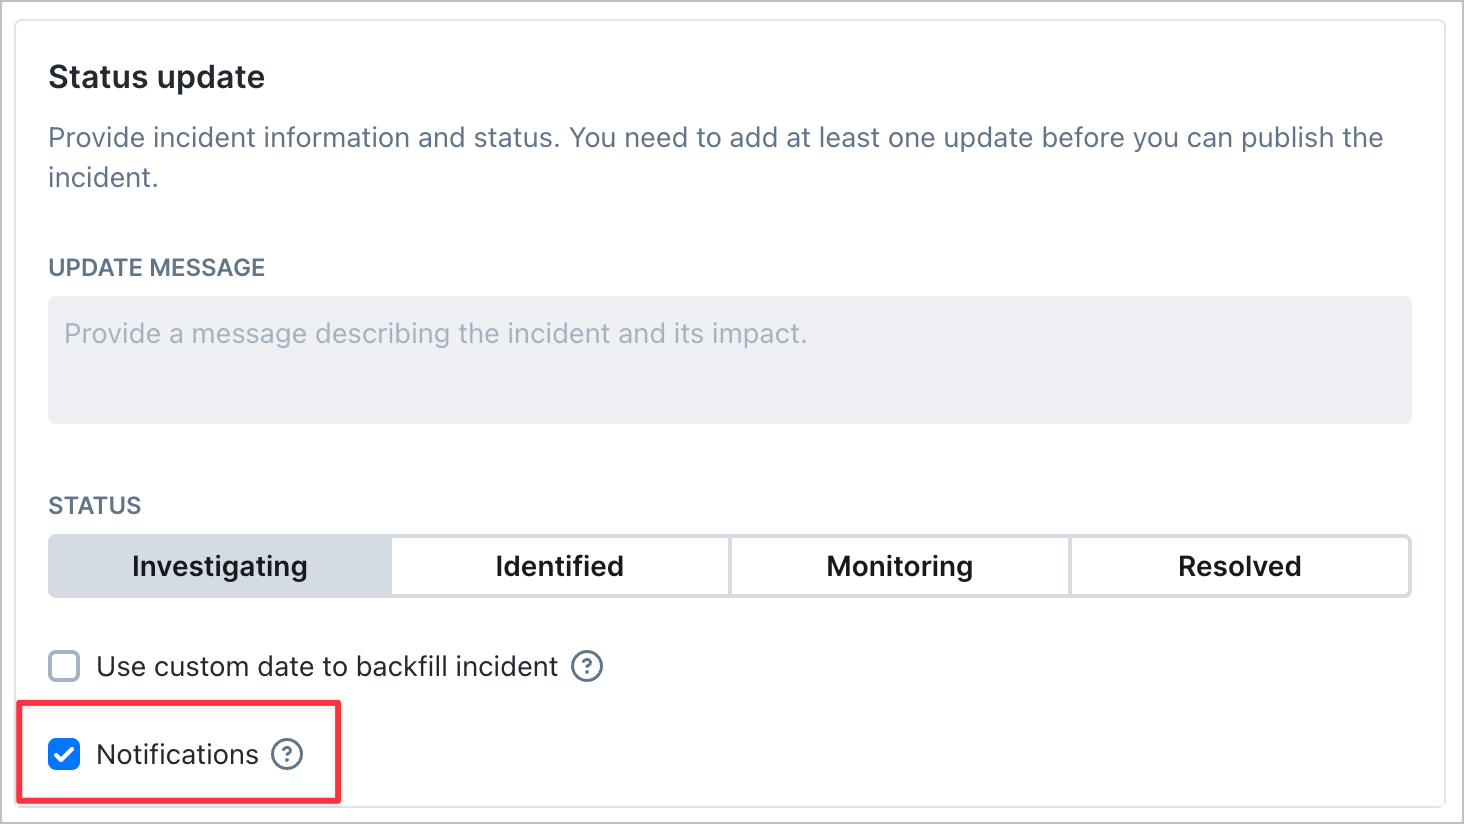
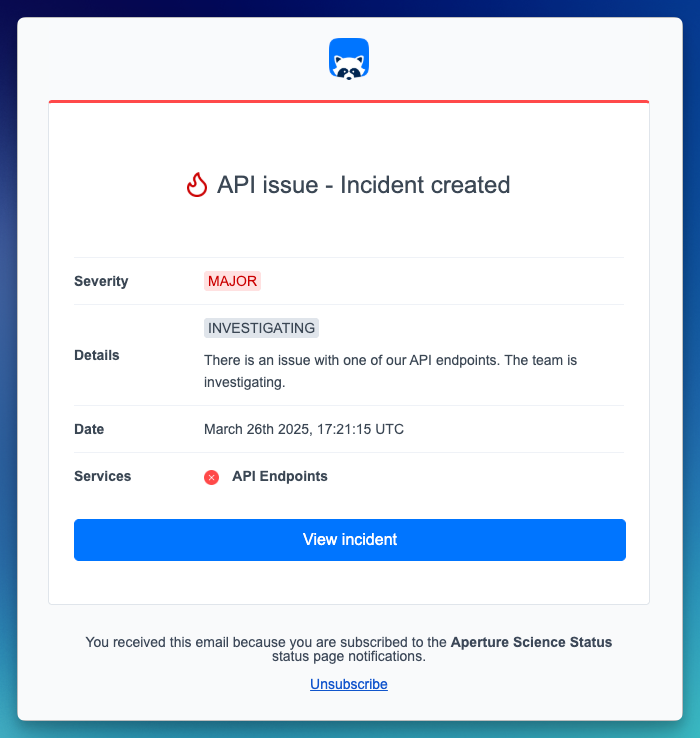
Subscribing to incident notifications
Subscribing to incident notifications is done on your Status Page. To subscribe, a user needs to enter a valid email address. A verification email will be sent to the registered email, and the user will be ready to receive incident notifications after confirming the subscription.Incident automation
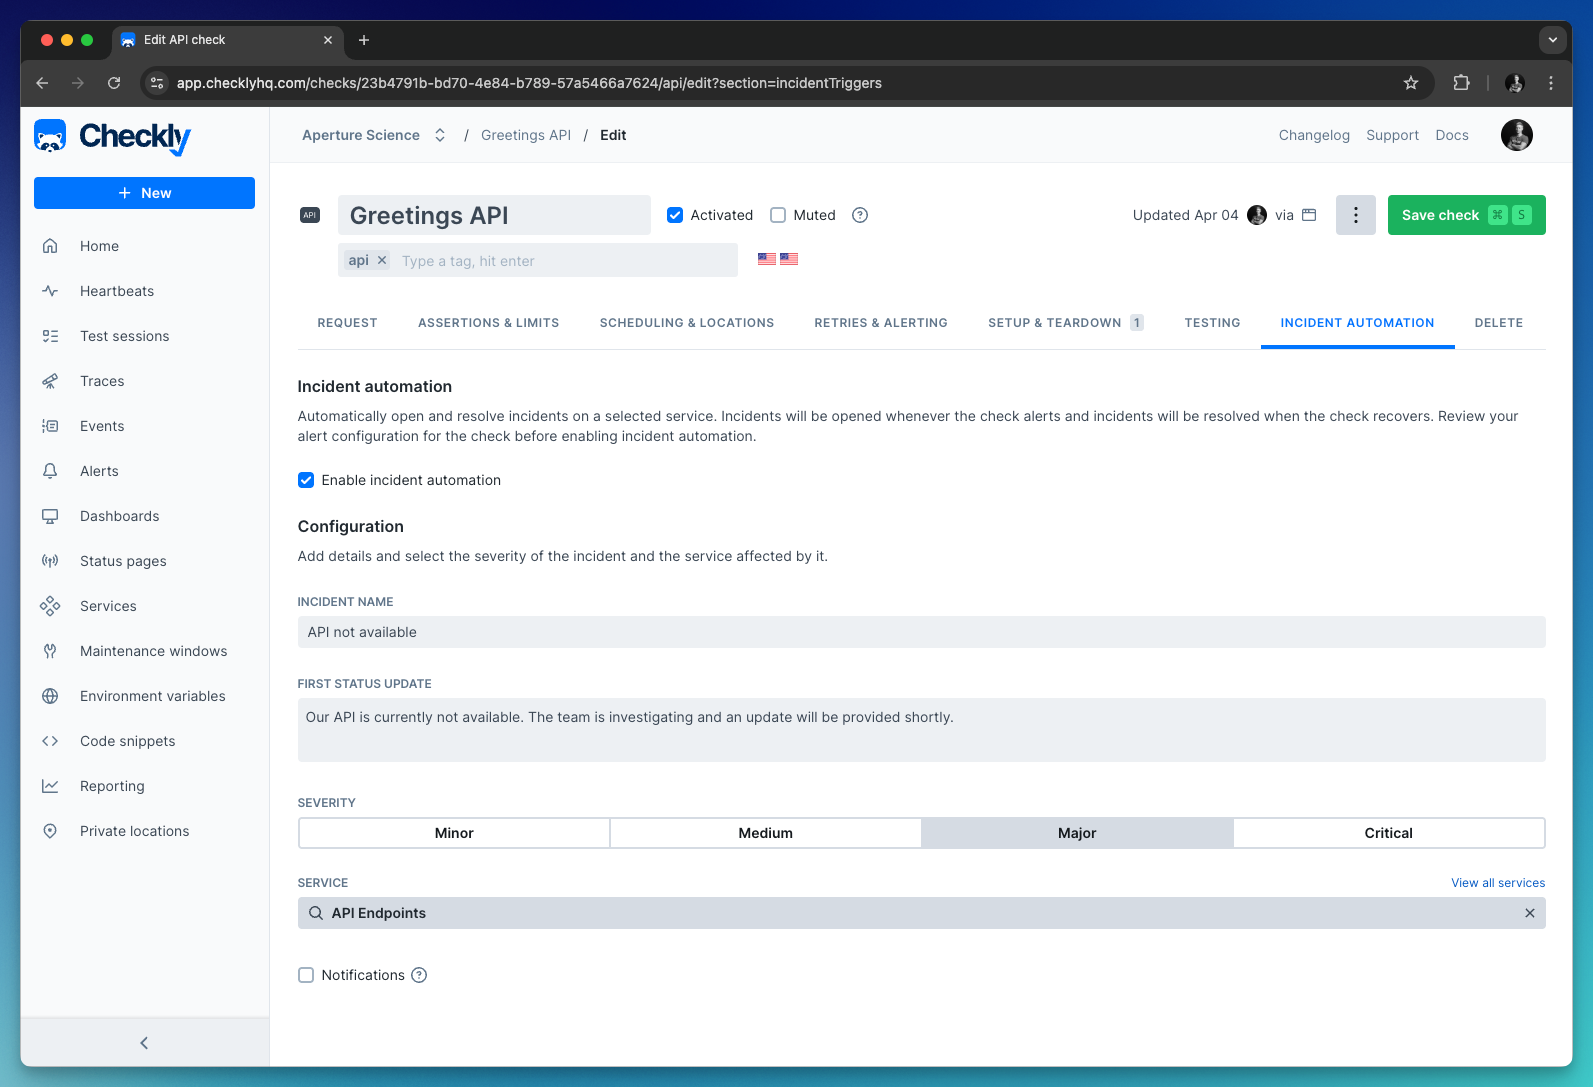
Incident automation opens incidents automatically whenever a check fails. It works by connecting a check to a service. Multiple checks can be connected to the same service through incident automation. After connecting:- When the check fails and triggers an alert, it will also open an incident on the connected service.
- The incident will be automatically resolved when the check recovers.
Incident automation is available on Communicate Team and Enterprise plans. View pricing
- Open your check from the home dashboard.
- Click ‘Edit’ in the check overview page.
- For API checks, URL monitors and TCP monitors, click the ‘Incident triggers’ tab. For Browser and Multistep checks, first click ‘Settings’ then ‘Incident automation’.
- Check the ‘Enable incident automation’ checkbox.
- Fill in the incident name, a first status update and the severity of the incident which will be created upon the check failing.
- Select which service the incident should be opened on.
- Select if the Status Page subscribers should be notified when the incident updates are automatically posted.
- Save your check.
Backfilling an incident
Backfilling allows you to add incidents for downtime that happened in the past. Use backfilling to provide accurate uptime information to your users. To backfill an incident, follow the steps 1 - 7 in the Creating an incident process. Next, select ‘Use custom date to backfill incident’ and pick the date and time when the incident started.